Monday, May 27, 2013

Memorial Day Projects

It's been a good day for projects, spending time together, visiting with friends, lovin' up on our sweet dog (who just loves to help us out with yard projects).  We are thankful today for the freedom we enjoy and for the sacrifices of so many to protect our country.  As they say, freedom isn't free, the high price should make us ever grateful of the blessing we have in the USA.

Demolition of extra concrete.  One day, this area will be a beautiful garden and grassy backyard (hopefully!).  Step 1: Digging up concrete
But... unable to take it to the dump, because they were closed.  So this project is in process :-)

Our first garden!!!
And our faithful overseer :-)

Bryan's parents tackelled a little project of their own, unlike us they finish what they start!  Looks awesome.  Hydrangea to grow up their beautiful trellis.

Friday, May 24, 2013

House Tour

Welcome to our home!  As promised, here is a long over due house tour, and updates on what we've been up to over the past few weeks.

Front Yard


Already done: painted front door (Sherwin Williams Labradorite); lots of RoundUp, weeding, and pruning
In process: widening driveway for 2 cars to fit side by side; vegetable garden
Still to do:
  • more RoundUp to eradicate vines, ivy, and invasive wisteria that are so at home in our yard
  • have several old pine trees cut down
  • landscaping - several hedges need to be removed, add some interest to get rid of the straight line of bushes across the font
  • move location of fence on side of house to make back yard "larger"
  • improve grass coverage (grass is pretty splotchy in the front, and basically non-existant in back)
  • later on... add invisible fence for Keller, have driveway redone (current asphalt is in rough shape)

Family Room


Already done: painted built-ins and walk-through bookshelves white
To Do:
  • paint trim & doors
  • curtains (thinking something like this linen/burlap look from World Market)
  • furniture: light brown sofa is going to my sister in August, and it will be replaced with club chairs from Bryan's aunt that need to be recovered.  (dark brown sofa & love seat from my aunt & uncle, rug from my grandmother - it's amazing how we have put everything together through everyone's generosity!)
  • add overhead lighting (2 rows of several cans and a central light or fan)

Dining Room


Already done: de-bling chandelier; first transom shown here as a prototype for the other 4 (full post on this later)
To Do:
  • touch up paint (we are leaving the stripes, but don't have any leftover paint for the darker stripe, so we will have to repaint all the dark stripes)
  • paint trim & doors
  • furniture - we have a table, but no chairs... trying out these upholstered chairs (from Pier 1) are top contenders.  If we go with 6 of these, will make slip covers

Drawing Room


To Do:
  • paint (I'm thinking a greyish green color - you can see a sample to the left of the window)
  • paint trim and doors
  • repair broken pane in french doors

Kitchen


Already done: painted beadboard white
To Do:
  • paint trim & doors
  • make curtains (here is my fabric)
  • later on... build banquette to allow for seating around all sides of the table

Master Bedroom & Bathroom


Already done: added overhead light to fan, installed hand towel ring in bathroom
To Do:
  • paint bedroom (tan color - paint is already purchased, so hopefully this will happen next week)
  • paint trim & doors
  • make curtains & coordinating pillows (here is my fabric)
  • new shower head! (this one is terrible in the amount of water it puts out, fortunately the hall bath shower has much better water flow, so we currently use that one)
  • later on... replace the tile on the walls (which was turquoise and is now painted white) with white beadboard, maybe convert tub area to walk in shower?

Hall Bathroom


To Do:
  • remove wallpaper and paint walls (previous owners painted over wallpaper, which has bubbled in some areas)
  • paint trim & doors
  • resurface tub
  • replace several fixtures (right now it is a mix of brass and polished chrome)
  • find something to go above toilet for extra storage (currently zero storage in here for even an extra roll of TP)
  • later on... replace painted tile on walls with white beadboard

Green Bedroom


 To Do:
  • paint walls (pale yellow)
  • paint trim & doors
  • curtains & bedding (no fabric selected yet)

Blue Bedroom


Already done: no more stripes - after many hours of sanding, this room is painted green!
To Do:
  • paint trim, chair rail & doors
  • make curtains and pillows (here is my fabric)
  • needs a lot of furniture: headboard, dresser, chair, and little table for under window

And that's a wrap!  We love the flow of our house, how spacious it is, and the personality it has simply by being over 60 years old.  As you may have noticed in my to do lists, all the doors and trim desperately need to be sanded and repainted.  We are also working to restore the original transoms.  These projects will take months (or in the case of repainting ALL the trim... years).  But that, I guess, that is part of the joys of homeownership - it's a work in progress.  The previous owners did SOOO much to update the house and we are excited to build upon the work they started.

Come visit us if you are ever in or near Columbia!  We hope and pray that our house will be used as an instrument of hospitality and a place for ministry and fellowship to occur - all to the glory and praise of God!

Thursday, May 23, 2013

Our New Life in Cola

Well, it's been a while since I've blogged... oops.  Still trying to improve my consistency.  We have been VERY busy, and I haven't had the time self-control to sit down and keep this thing updated! Since last post we have:

  • finished school
  • celebrated a family wedding
  • took & passed our last part of boards and our last test ever!!!
  • moved from Mt. Pleasant to Columbia
  • celebrated B's grandmother's 80th birthday
  • begun to work on & improve our home to fit us
  • graduated from dental school!!!

Here is a little explanation and photo tour of some of the above happenings.  Full photo tour of our house before we moved in will come tomorrow.

A Small Family Wedding

Bryan's uncle got married at the house where he grew up and where Bryan's parents currently live.  It was a small family affair that was sweet and beautiful.


We Moved to Columbia

We LOVE our new house!  It is a perfect fit for us.  Full house tour tomorrow.


80th Birthday

Bryan's grandmother, Peg, turned 80 this month.  We had a elegant drop-in for her birthday.  Bryan's mother entertains so effortlessly, whether its a drop-in of 50 people over 60 or our graduation party 6 days later.  I didn't have my camera at the party, but I assure you it was quite the soiree.


Home Improvements

Again, I'll share pictures of this over the next few days... and then for the next few years :-)  But the short list so far includes: painting (several rooms and built in book shelves), lots of pruning and weeding, expanding our driveway, "borrowing" lots of furniture from family to fill our home, restoring the original transoms above the windows, updating outlets and light switches... I could go on.  We have LOVED being homeowners!


Graduation

Last Friday Bryan and I became doctors!  We had several days of celebration and festivities with both our families.  It was a wonderful weekend.  Praise the Lord for His blessings and for this time of life to celebrate and rejoice in His sustaining grace that has carried us through!

James B. Edwards College of Dental Medicine Class of 2013


Tuesday, April 23, 2013

What Am I going to Miss Most?

Ok, so I'm starting to really believe it is coming to an end.  We have 3 days of school left.  And I feel really, really sad about leaving this place for the first time.  I know I will miss the freedom and fun that school is (or at least the freedom and fun of 3rd and 4th year), all our friends, the awesome restaurants and events of Charleston, and our amazing water front view.  But what I'm going to miss most of all just probably happened for the last time.

We got home today; long day by dental school standards (i.e. got home at 4:45).  And there was Pandy, waving us in for a cup of coffee.  We nibbled on left over cake, a cookie, and some chips, enjoyed instant coffee, and just sat and talked, laughed, prayed... 2 hours later, Pawpaw called saying he's on his way home from the farm with Mama Brown's (i.e. favorite family BBQ joint) - do the yard children want to eat with us (that's our name, given to us by Deedee Melchers)?  Of course we do!  And there you go, an entire evening spent with these precious people.  This is our little tradition every 2 weeks or so, and I'm going to miss it so much.  Tearing up just at the thought that this is the last time we will have our impromptu coffee/dinner evenings.

I am so thankful for these four years and the opportunity to get to know two of the most amazing people ever.

Now I'm going back over to eat BBQ and some of Mama Brown's amazingly unhealthy but ridiculously delicious sweet potato casserole, and savor every moment of these precious memories that I will never forget.

Friday, April 19, 2013

Senior Stuff - boards, banquets, and biscuits

Let me catch you up - Bryan and I graduate in LESS THAN 1 MONTH!  I still can't believe it.  We've passed boards - don't believe that one either.  Tonight is OUR Senior Banquet - not sure that's really true.  At some point I'm going to be shocked when all this sinks in - we are DONE with dental school!

After four long years, you would think I would be ready for this, but I'm not.  The past 4 years have been the fastest of my life.  Yet, in those 4 years I have learned so much and the way I look at the world (and definitely peoples' teeth) has changed drastically forever.  It's amazing when I think back to all that I didn't know about 4 years ago.  A simple (yet scary) example is that I'm not sure I really knew what I root canal was 4 years ago... now I am weeks away from being a licensed dentist, and yes, I do know what a root canal is and even how to do one now :-)  But when I think back on how much I've learned and how my perception of health and teeth will never be the same, it starts to make sense why it feels to go by so quickly.

Boards (taken last weekend) was a fiasco.  Bryan and I were very blessed to come away unscathed, but many in my class had issues due to a new board that was.... lets just say they were beyond incompetent at running a national board exam, and many, many people failed due to errors on their part.  It has left a bad taste in everyone's mouth, even the people like us that were fortunate to pass on the first go round.  We are blessed to have a wonderful dean who has stood up for the students and demanded they offer the exam again at our school.  This doesn't fix everything, but is a big help to those who have to take it again.  Needless to say, this has been unwelcome drama and stress for our class here at the very end.

Tonight is the Senior Banquet.  A final chance to be together, laugh, poke fun at faculty and ourselves, and enjoy witty nerdy dental jokes with a roomful of people who laugh with you instead of give you condescending looks for laughing about teeth.  I have come to love the 55 people in my class so much and will miss them dearly when we part after May 17th.

Biscuits??? This has to do with school, I promise :-)  When we spend the week blocked in either oral surgery or oral medicine, tradition requires a Friday breakfast feast.  The faculty have us conditioned to spend time and money to bring them a hot and creative breakfast every Friday.  A few weeks ago, I made these delicious mini-scones (Recipe source: Leite's Culinaria).  If you ever need a scone or biscuit for a luncheon or tea, these are phenomenal!


The picture doesn't do them justice.  They are so tasty.  I used asiago cheese (other option was to use gruyere).  Next week is the last week of clinic and I will be in oral surgery, so you can look forward to another tasty breakfast treat next week.

Oh - and guess what we are doing tomorrow?!?  Moving the first load into our  new house!!!  Wait, you mean we actually really own the house we bought back in February?  Weird.

Wednesday, April 3, 2013

Tiramisu Pound Cake

As promised, here is the recipe for the cake that was popular last weekend with the family.  I am proud to say I actually made it up myself (usually I am only creative enough to copy other people)... well, probably more accurately, I adapted it all myself).  This creation started with my mom's chocolate pound cake recipe, then Bryan and I had the tough job of running our own "test" kitchen to figure out just the right combination of coffee & liquor for the glaze (it's rough work, but someone has to do it :-).  Lastly, I adapted the sweet mascarpone cream from a recipe I found on the internet.  All and all, this cake is rich but not too heavy, and sweet but with a little bite from the coffee.

My disclaimer is that this cake was not my idea. I saw a post for Tiramisu Pound Cake on one of my favorite blogs (Everyday Occasions by Jenny Steffens Hobick).  But she hadn't listed the recipe, and her cake was a vanilla pound which just isn't quite my thing (I mean, if you are going to splurge on calories, why do anything but chocolate?!? :-)  So, then this recipe was imagined up, and it is definitely a keeper!


Tiramisu Pound Cake with Sweet Mascarpone Cream

Ingredients: Cake

1/2 lb butter
1/2 cup shortening
3 cups sugar
5 eggs
1 cup milk
1 tsp vanilla
1 tsp baking powder
1/4 tsp salt
5 Tbsp cocoa
3 cups flour

Ingredients: Glaze

1/4 cup coffee, cooled
1/4 cup coffee liquor (I used Kahlua)
1 1/2 tsp vanilla

Ingredients: Sweet Mascarpone Cream

1 cup chilled whipping cream
1/2 cup mascarpone cheese
1/4 cup sugar
1/2 tsp vanilla

Make the cakes:

  1. Preheat oven to 350.  On medium speed in a mixer with paddle attachment, cream butter, shortening & sugar.  Add eggs one at a time, mixing after each addition.  Add milk and vanilla; mix well.  Combine dry ingredients and add gradually to butter/sugar, mixing well after each addition.
  2. Pour batter into greased and floured round cake pans.  Bake at 350 for 50 minutes, or until knife inserted in middle comes out clean.  Allow cakes to cool for a few minutes, then loosen the sides and allow to cool completely.
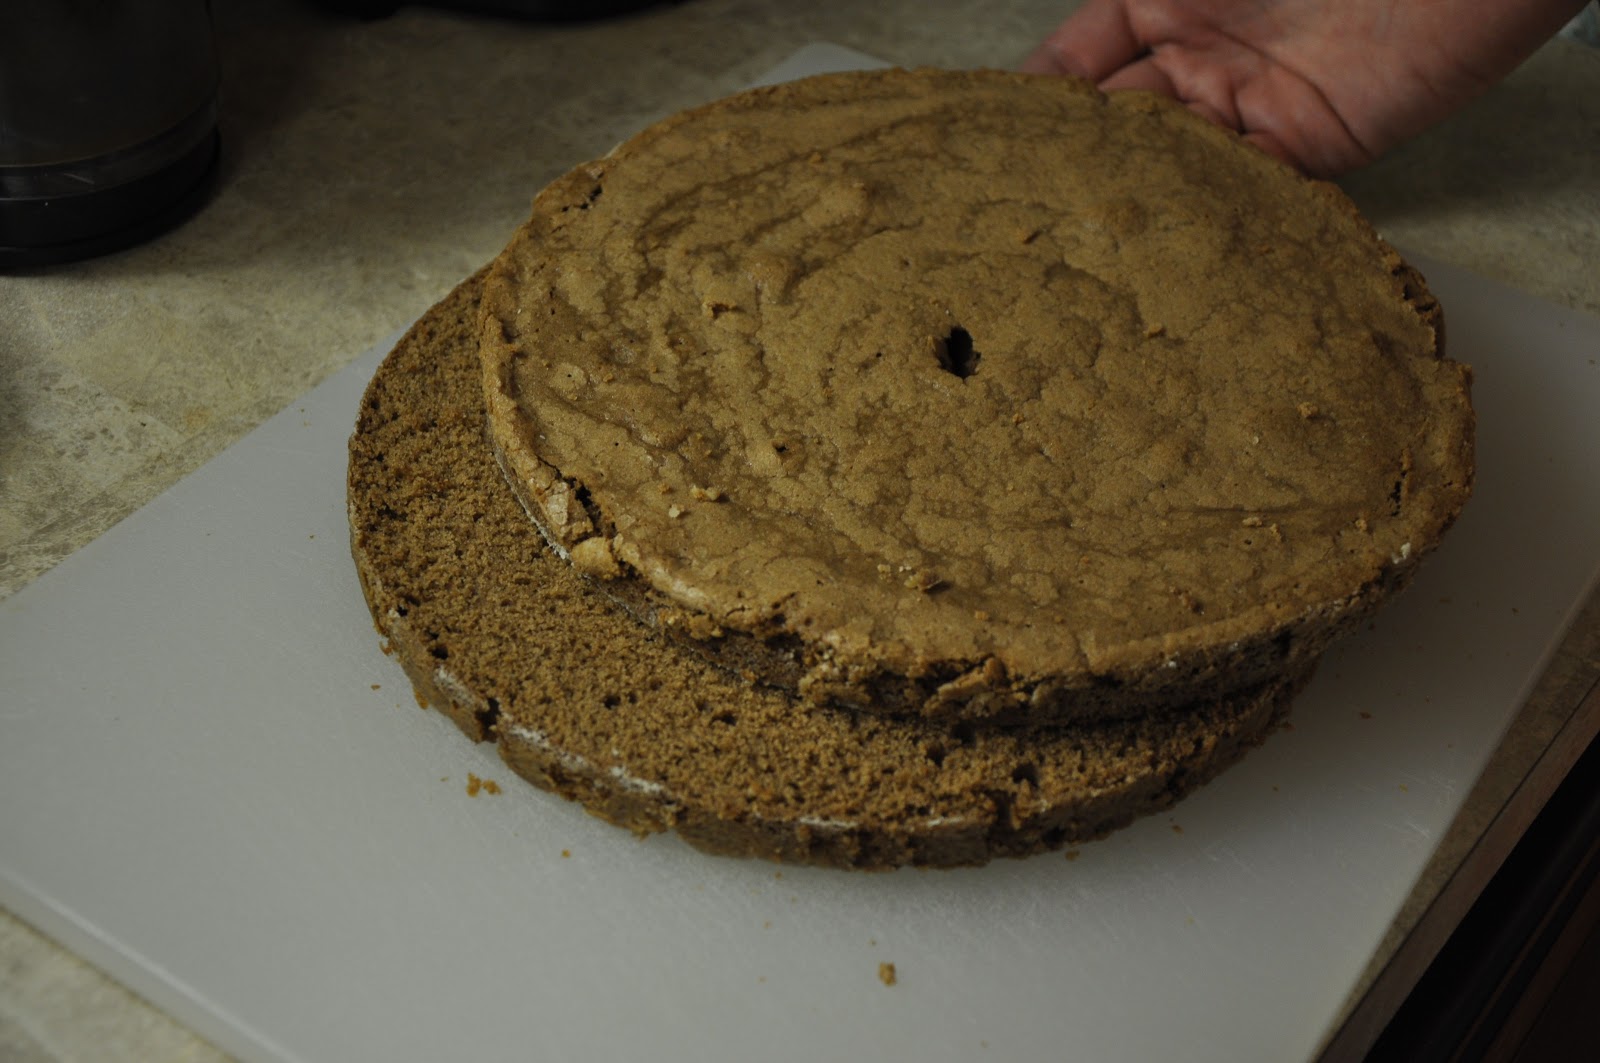
  3. Cut cakes in half (see below for instructions).
cakes, ready to go into the oven

Make the icing:

  1. Place all ingredients for the sweet mascarpone cream icing in the mixer with the whisk attachment.  Beat on high until mixture thickens (about 2-3 minutes).
  2. Cover and chill in refrigerator until ready to assemble cake.  The icing can be stored for a few days if needed.

Assemble:

  1. Brew coffee and cool to room temp (a little time in the freezer speeds this along nicely).  Mix together the coffee, Kahlua, and vanilla.
  2. Start with cake layer up-side down, and brush the underside of the layer with the coffee mixture using a pastry brush.  Carefully place this side down on the cake stand/platter, then brush the top side of cake with coffee mixture, then mascarpone cream.  Repeat until all layers are used.
  3. If desired, garnish with fresh strawberries.  Keep cake refrigerated until ready to serve.


Notes:

1. Cutting the cakes in half: I know this sounds silly, but there is definitely an art to this when you are dealing with rather thin cakes.  Bryan knew right away what to do, and it was rather ingenious, and made the whole thing pretty easy.  Here are his instructions.

you will need fishing line and a sharp knife
(we had 2 lb test on hand)


make cuts about 1 inch into the cake on four "sides"

feed the fishing line into the four cuts,
then have them cross one another,
and pull in opposite directions gently

perfectly cut!

2. How much this recipe makes: In the past I have always used this cake recipe to fill up a bundt pan.  Obviously, I used 2 round cake pans this time instead.  As I was making the cake, I realized that I needed a dessert for the next day for school, so I saved a little batter to use for cupcakes.  These also came in handy for testing the glaze recipe.  They also turned out supper cute - which made me think that you could definitely do these as mini-cakes for a shower or party.


In the picture above, I cut the cupcake in half, dipped each half very briefly in the glaze, then put the top of the cupcake (which is the top layer of the two) upside down.  The domed part of the cupcake (which was facing down) helped create a nice space for the icing, which made it extra pretty (obviously, this effect did not happen on the cake because there was no dome and each layer of the cake was so heavy).

our sample plate - it took about 5 tries
to get the concentration right on the glaze

Long story short - if you use the entire cake recipe for two round cakes, your layers and consequently your cake will probably be a little thicker than mine turned out to be.

3. Cake assembly timing: I assembled the cake a few hours before we ate it because I was worried about it getting too soggy.  But when we ate leftovers the next day it was just as good or better.  So feel free to assemble a day in advance.

Enjoy!